
Hey there!
So we've got our supplies ready!
And we know our 10 steps!
I had planned to show you a real cleaning apron until I got it and really LOOKED at it!!!!
My Cleaning Apron is so gross!!!! I'm so embarrassed for you to see it. So I went looking for one online.
I visited a friend Karen @ karenehman.com and she had an adorable apron made by Sheri who has an Etsy shop with some really cute items. Give her store a look see. This is one of her cleaning aprons. Isn't it adorable? I only have one thing that needs to be changed and that is there are no little pockets to hold the toothbrush or scrapers. Other than that it is ready to help me clean the Kitchen.
When I first started cleaning homes I wasn't too keen on the idea of having to wear an apron with all this stuff hanging off. And you're probably asking yourself, just like I did...."Why in the world do I have to wear an apron to clean my house?" I can just use my Carry-All Caddy and grab my stuff from it." Your right, you could. Because I did. I didn't think there would be a difference. Because you still have to take the caddy into every room with you. But trust me it makes a huge difference. For one thing, you will have to sit the caddy down on the floor or counter-top. Right? You get the product you need for that one job....say the toilet bowl cleaner and the toilet bowl brush. And of course you need to get your gloves on. Speaking of gloves aren't these just the cutest in the world? I found them on Etsy too! Anyway.....You go over and pour some cleaner into the the bowl, you sit the cleaner down and then you scrub the bowl with the brush and when you're finished you pick up the cleaner and the brush and carry it back over and put it back inside the caddy.
Now!! If you have the apron on you're going to put the products in the pockets that you're going to need for that room. So when you get ready to clean the toilet, you already have the product and the tool you need with you and when you finish you put it back into the apron and move on to the next task and the next product. You see! You have cut out 4 to 5 wasted steps. I know! I didn't realize how much wasted time and effort I was spending until I did it. Now trust me it is going to take you a few times to get the system down. But when you learn to put things in the same pockets every time, you will automatically know right where to reach for the tool and product you need for that very task without needing to stop and look!
Okay!!!!
Ready!!!! Apron Loaded!!!! In the kitchen you will need:
Starting Point
In the kitchen you will be using the picking up and lifting motions a lot.
For instance:

So we've got our supplies ready!
I had planned to show you a real cleaning apron until I got it and really LOOKED at it!!!!
My Cleaning Apron is so gross!!!! I'm so embarrassed for you to see it. So I went looking for one online.
I visited a friend Karen @ karenehman.com and she had an adorable apron made by Sheri who has an Etsy shop with some really cute items. Give her store a look see. This is one of her cleaning aprons. Isn't it adorable? I only have one thing that needs to be changed and that is there are no little pockets to hold the toothbrush or scrapers. Other than that it is ready to help me clean the Kitchen.
 |
| {Busy as a Bee} |
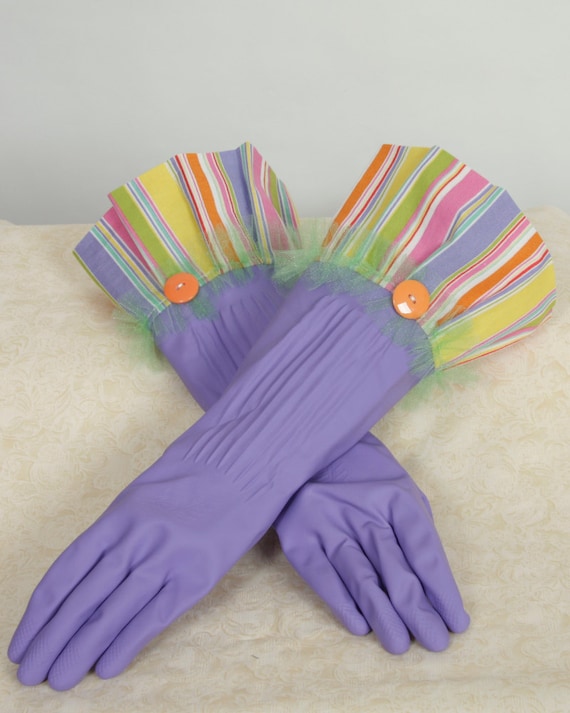 |
| {Diva Gloves by Apron Queen} |
When I first started cleaning homes I wasn't too keen on the idea of having to wear an apron with all this stuff hanging off. And you're probably asking yourself, just like I did...."Why in the world do I have to wear an apron to clean my house?" I can just use my Carry-All Caddy and grab my stuff from it." Your right, you could. Because I did. I didn't think there would be a difference. Because you still have to take the caddy into every room with you. But trust me it makes a huge difference. For one thing, you will have to sit the caddy down on the floor or counter-top. Right? You get the product you need for that one job....say the toilet bowl cleaner and the toilet bowl brush. And of course you need to get your gloves on. Speaking of gloves aren't these just the cutest in the world? I found them on Etsy too! Anyway.....You go over and pour some cleaner into the the bowl, you sit the cleaner down and then you scrub the bowl with the brush and when you're finished you pick up the cleaner and the brush and carry it back over and put it back inside the caddy.
Now!! If you have the apron on you're going to put the products in the pockets that you're going to need for that room. So when you get ready to clean the toilet, you already have the product and the tool you need with you and when you finish you put it back into the apron and move on to the next task and the next product. You see! You have cut out 4 to 5 wasted steps. I know! I didn't realize how much wasted time and effort I was spending until I did it. Now trust me it is going to take you a few times to get the system down. But when you learn to put things in the same pockets every time, you will automatically know right where to reach for the tool and product you need for that very task without needing to stop and look!
Okay!!!!
Ready!!!! Apron Loaded!!!! In the kitchen you will need:
 |
| {Carry-All Caddy} |
- Powdered Cleanser (B.K.F.)
- Window Cleaner
- 409
- Blue Scrub Sponge
- Duster (this will go into your back pocket of your pants.)
- Rubber Gloves
- Scraper
- Toothbrush
- Razor-blade Holder with a Sharp Blade
- 2 Plastic Zip Bags
- 4 Big Clips (black binder clips work great!)
- 4 Cleaning Cloths/Keep additional ones in your Carry-All Caddy.
Hand carry your mop, bucket, broom w/dustpan, and have them ready and right there, for when you are ready to use them.
Set!!!! Apron On!!!!
Go!!!! Start Cleaning!!!!
 |
| {Set you Carry-All Caddy here and leave it until you are ready to leave the room} |
- When you walk into the kitchen you will set your Carry-All Caddy on the right side of the sink! You will work Clockwise through the room (and every room you clean).
In the kitchen you will be using the picking up and lifting motions a lot.
For instance:
- Take out the duster and dust the area to the right of the sink from top to bottom and put the duster back into your apron
- Get 409, lightly spray, wipe and replace
- And so on
The rhythm will get natural the more you do it! Trust Me!!!
The order will depend on your own floor plan. This is mine so that's where I will start.
Cabinets,Counter Tops & Fingerprints
- Set the trash can outside the door. Don't empty yet because you will be placing all the trash from the other rooms in it.
- Place rugs out flat onto a carpeted area to be vacuumed when you get to that room.
- Use 2 cloths.
- Use one to wipe and put the other over your shoulder to have quick access too.
- As the one you are using gets too wet to dry put it in one of your apron pocket with the clipped plastic bag to use for general wiping.
- Grab another dry cloth from your apron or bucket and throw it over your shoulder.
- Go to your starting place just to the right of the sink. Dust the upper cabinets. First lightly spray and wipe any fingerprints using 1 of your cotton cleaning cloths and 409.
- Lift up your Carry-All Caddy and wipe the counter top from back to front and replace your caddy. Always work from back to front.
- Don't forget the drawer fronts and knobs also. These get used quite a lot.
- Dust and wipe fingerprints from lower cabinets.
- Idea is to be focused, efficient and fast. Remember IF IT ISN'T DIRTY DO NOT CLEAN IT!!!! When you spray anything do it lightly. The more you spray the more wiping you have to do and that is time!
- Work your way around the kitchen. Get in the habit to replace your spray bottles into the loops on your apron and not on the counter tops.
- When you have those tough areas like dried glop, spray and leave it while you continue to clean that counter top. It will be ready soon to care for either with your scrapers (hold at a 45 º angle to not cause damage) or simply giving a scrub with your kitchen scrub sponge. Then wipe.
- Remember to "see" through the spray with your fingertips to be sure the space it clean before you wipe.
- If you need to clean a glass front or mirror you have what you need on your apron and won't waste any step or time to go get it from caddy.
- Remember to check for cobwebs and dust bunnies.
- Get these with your duster.
- Open shelves will probably only need to be dusted on the front edge and the top of items on the shelves.
- If it has been a while and you need to take things off BE CAREFUL.
- Start with top shelf and move items to the right and dust the left and then reverse.
- The first time you clean the refrigerator, clean top first working your way down. Just like shelves move items to the right, clean the left then reverse.
- Next time you will only have to dust and wipe front and handles.
- Use your toothbrush to clean around hinges, rubber gaskets and handles.
- This area isn't too easy to just dust if you haven't done it in a while. Grease, steam and dust don't make too good of friends. Use you 409 cleaner and a cloth to wipe this area clean
- Next time you will be able to simply dust.
- Vent Hood; Take out filter(s) and run through the dishwasher. If they are really bad you may need to replace them.
- Always clean up spills as soon as your stove cools down. This makes cleaning it much easier.
- Ceramic Glass Top Stoves. Use your 409 cleaner to wipe it clean. If things are really messy and marked up then use a special cleaner made just for glass stove tops.
- Electric Stoves. Remove heating elements and bowls. Place bowls in dishwasher. Depending on how yours is made, either lift top up and use 409 cleaner to clean under burners or clean by reaching through and under burner holes.
- Gas Stoves. Remove grids and flame caps & place in dishwasher. Wipe using 409 cleaner.
- Knobs. Wipe area and knobs and if they come off lift off and clean under the knob.
- Front. clean with window clean IF IT NEEDS IT ONLY!
Toaster, Microwave and Can Opener
- Make your toaster & can opener look like brand new using your Razor Blade Scraper . Remember to hold it at a 45 º angle. Spray liberally with 409 cleaner first. Then gently scrape the brown gunk right off. You may also need to use your toothbrush to get into those crevices.
- Spray and wipe the microwave inside and out. If there is stuck on glop spray cleaner, close door, "cook" for 1 minute and then open the door and wipe clean. Use your plastic scraper if needed.
Middle of the Room
- Island. If your cook top isn't here then just spray and wipe clean
This is your last area. There shouldn't be any dishes here because that is a daily chore.
If they are put in dishwasher first.
- Clean the rim, faucet and handles with 409 cleaner and toothbrush.
- Clean sink below the rim with the kitchen scrub sponge & powdered cleanser (B.K.F.) conveniently located in your Carry-All Caddy to your right.
- Use toothbrush to clean around the drain and stopper.
- Rinse well so no powdery residue is left behind.
- Fill Mop Bucket with hot water and a few drops of dish washing liquid.
- Dry sink with cloth so it shines!

- Sweep, Dust Mop or Vacuum floor
- Pay particular attention to corners and kick board.
- Mop starting at the point farthest from the exit door and continue all the way across kitchen.
- If you need to wax the floor I recommend using a product like Brite. It won't leave a build-up on your floor.
And we are finished with the kitchen. That wasn't so difficult now was it?!
The Kitchen is probably the room with the most moving, lifting, spraying and wiping. All your rooms will be done basically with the same steps. I know there seems to be a lot to do but really once you get started you are going to be amazed at just how quickly you are finished.
Tomorrow we will work on cleaning the Bathroom. So be sure you check back in to see just how quickly we get that room done!
♥Please if you have any questions about anything I've shared with you or you have ideas that you would like to share leave a note below by clicking on the "Comment" link in the bright green box at the bottom of this post and I will do my best to get you a quick answer. Also when I have mentioned many items and locations to purchase them; I do not get any money or kick back for doing so. I am merely trying to make it easier for you to locate the items. Thank you so much for your visit here today and I hope you were able to glean something from it.
Encouragement For The Spirit:
It is far better to not say you'll do something than to say you will and then not do it.
~ Ecclesiastes 5:5 ~
Blessings ♥
Betsy

No comments :
Post a Comment
Thank you so much for taking the time to leave a comment.
I really love hearing from you!